The red-tailed boa is a member of the Boidae family of snakes. The sub-species are simply called “boa constrictors but the dominate species is the B. c. constrictor referred to also as the red-tailed boa and sometimes the boa constrictor imperator.
It can be found in North, South, and Central America.
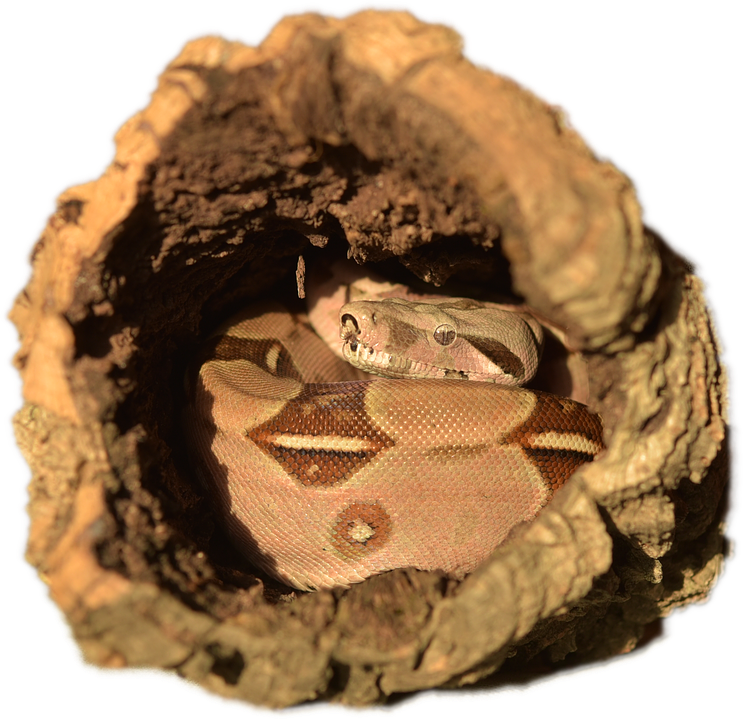
Habitat in the wild
The boa constrictor can survive in a wide array of habitats from semi-deserts to rain forests. The most important aspect of its environment is the temperature.
They prefer humid areas and in rain forests often live by rivers where they have plenty of ground cover. When they are younger they sometimes hang from trees but as they get older and heavier they tend to stay closer to the ground.
They are good swimmers and spend some of their time in the water.
They often burrow in holes dug by mammals or in hollow logs where they are safe from predators.
Diet in the wild
The boa’s diet consists mostly of rodents. But they will also eat birds, lizards and sometimes larger mammals such as opossums. The size of their prey changes as they get larger and older.
It is the boa’s tongue that senses prey first, usually within a distance of twenty inches. The boa strikes quickly and uses its teeth to assure the prey doesn’t escape. It then coils its body around the prey until it stops moving. It swallows the prey whole, head first.
The process of moving the prey down its body and into the digestive track takes fifteen minutes or longer. The boa will then hide and rest while it digests its meal.
A meal will last the snake from a week to up to a month depending on the age of the snake.
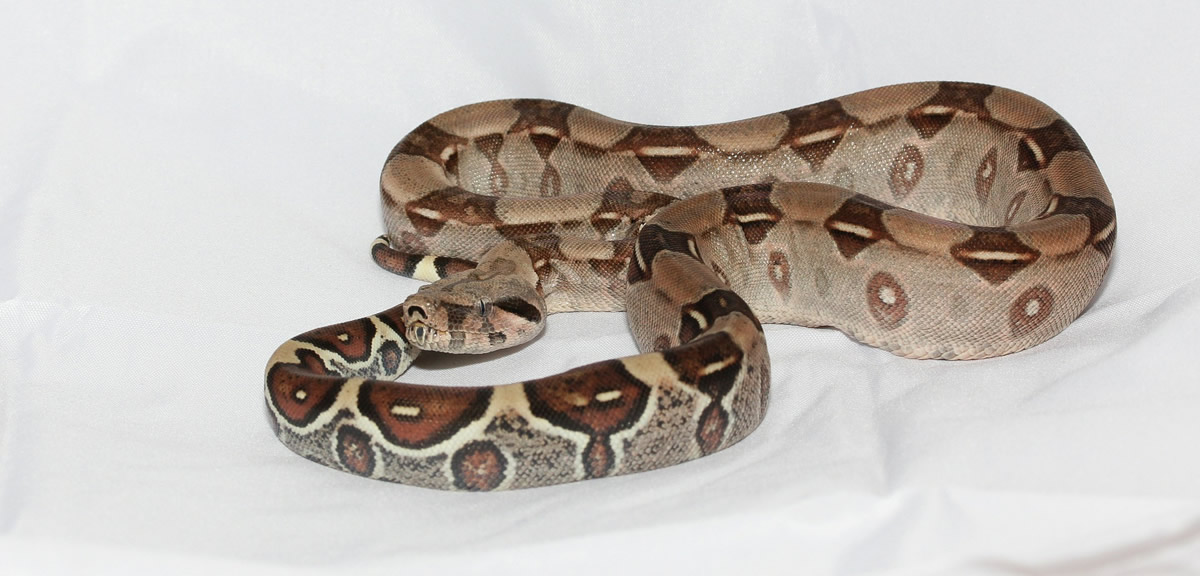
Appearance
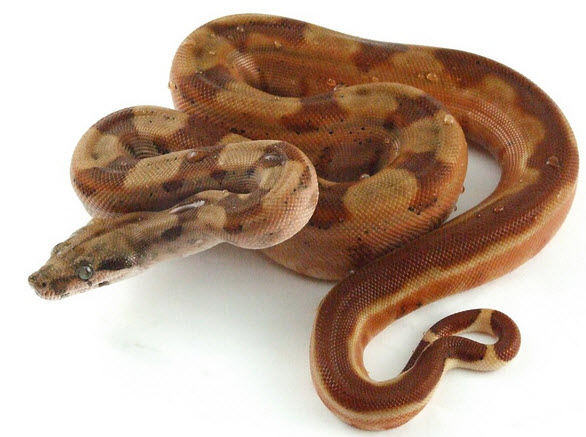 The boa constrictor is a large snake. An adult can reach lengths of ten to thirteen feet. Female are usually larger in weight and length than males. It does not grow as large as the python.
They weigh around twenty-five to thirty pounds with some reaching as much as sixty pounds.
Boa-constrictors can have a wide variety of colors. Generally they are a brown or grayish color with red patterns towards the end of their body. This is what gives them the name “red-tailed boas”. This coloring is an effective camouflage in areas of forest and jungles where these snakes are often found.
Their heads are shaped like an arrow.
Behavior
When they feel threatened the red-tailed boa will attack. When approaching any snake in the wild it is best to keep your distance. They are not venomous so their bite is not deadly but can cause a severe laceration.
These snakes keep to themselves unless they are mating. They do not live or travel in packs but will occasionally share a burrow in the ground.
Like most snakes, boas are nocturnal. They are usually inactivity during the day and move around and hunt for prey at night. They generally sleep twelve hours a day and are active for twelve.
They rarely travel far but explore every hollow log and ground hole in their area. They are good climbers but climb less as they get older and larger.
Mating and Reproduction
Red-tailed boas are polygynous so a male will often mate with several females.
The female will shed her skin two to four weeks after ovulating and it will last longer than a regular shed. The gestation period starts after the shed and last around 110 days.
Unlike some snakes, boas give birth to live snakes, not eggs, thus they are classified as ovoviviparous.
Litter size averages around twenty-five to thirty.
Newborn boas are fourteen to twenty inches long and only weigh a few ounces. During the first year they’ll grow to around eight feet long.
They become sexually mature at the age of three or four.
Red Tail Boa Constrictors as Pets
The red-tailed boa constrictor is one of the most popular snakes to keep as a pet. They are not venomous and adapt well to life in captivity. When purchasing a pet boa it’s always best to buy one that was bred and raised in captivity. A boa caught in the wild will usually be more aggressive.
Enclosures
As many other snakes, red-tailed boas are masters of escape. To keep your pet safe you’ll need to have an enclosure that is designed for snakes and has a secure lid. You can purchase an enclosure or build one yourself.
Tanks with screen tops are not recommended for two reasons – they are too easy for the snake to push open and escape and they make it hard to maintain the level of humidity your snake needs.
 The enclosure needs to big enough that the snake can move around. You may have to switch to a larger tank as the snake grows. These snakes can grow to ten to twelve feet long.
Keeping the temperature at the correct point is one of the most important keys your snake’s health. If they are too cold they won’t eat.
Part of the tank needs to be designed as the basking area and should be kept at 90 to 95 degrees. The rest of the tank needs to be at 80 to 90 degrees. Don’t guess. Put thermometers in the tank to assure the temps are correct. Heating bulbs can be used to keep the enclosure warm but they must be shielded so the snake cannot wrap around them or touch them in any way. Incandescent light bulbs are a good source of heat.
Do not use heated rocks as they can cause burns on your snake.
The flooring of the enclosure can be as simple as paper towels when the snake is young. As it gets older you can use a type of indoor/outdoor carpet such as astro turf. Have several pieces cut to size so as you clean one you can simply replace with another. The cage must be cleaned often to prevent bacteria or mold from forming.
Do not use rocks, gravel or coarse sand because it can cause abrasions on your snake and will not hold humidity well.
The snake will need at least one or two places to hide. Half logs can be purchased for this purpose. They should be only slightly larger than the snakes body.
Boxes can also be used as hiding places then thrown away when soiled.
A branch that is strong enough for the snake to climb up on is also good. It should be sterilized before placing it in the enclosure.
Handling
The first few times you hold your snake may be daunting to both you and the snake but with time you will both feel more comfortable. Holding the snake on a consistent basis when it’s young will help prevent problems when it’s older.
Pick up your snake by the mid-section. Hold firmly but do not squeeze too tight. A snake bite by a young boa might hurt but not too much. Expect a few bites along the way.
Once your boa is full grown to ten or twelve feet and weighs fifty pounds or more – it is better to have another adult nearby when you hold your snake.
If your boa begins to tighten its hold on you, unwrap it by pulling its tail away from you first.
Always wash your hands thoroughly before and after handling your snake.
Diet
Red-tailed boas are carnivores. They eat a diet of mice, rats, rabbits, and even chicken. You’ll need to know where you can purchase these items for your snake. You can find places online that raise these animals especially for this purpose.
Most snake owners feed their pet frozen mice or rats depending on the size of their snake. If the prey is too large the snake may try to eat it but will then throw it up. The prey should not be larger than the mid-section of your snake.
The good news is, snakes don’t need to be fed once a day like a dog or cat. A meal can last them a week or even up to a month. The younger the snake the more often it will need to be fed. A young snake should be fed once a week, older snakes every two weeks and eventually even every month.
Frozen food should be thawed slightly.
Do not handle your snake for about twenty-four hours after feeding.
Always wash your hands carefully after feeding your snake. It can cause accidental bites if your snake thinks your hand is his dinner.
Never feed your snake wild caught animals. They often carry bacteria and diseases that will make your snake ill.
Water
Your snake should always have access to fresh water. They will often crawl inside the bowl to soak so their water needs to be changed often.
While shedding they may even enjoy a soak in your bathtub.
Health Issues
It’s important to check your snake carefully before you purchase. Make sure that the eyes are clear with no discharge. Also, there should be no discharge around the mouth or vent.
Check the skin carefully making sure there are no abrasions or flaking. Never buy a snake that has mites or ticks.
The snake should not be limp when you hold him. A healthy snake will be more active and possibly aggressive. But if he’s more aggressive than you’re comfortable with do not make the purchase, wait for a more docile option.
If you’re buying online research the seller carefully. By visiting forums you can sometimes get recommendations of reputable dealers. Make sure they know how to ship boa’s correctly. It can be difficult to ship during the heat of summer or the cold of winter. They should always be shipped by overnight delivery so they are not in transit more than twenty-four hours. Make sure you or someone else will be home when your snake arrives so it is not left outside for any length of time.
Never put a new snake in an enclosure with a snake you already own. It must be quarantined for a period of time to assure it carries no diseases or parasites. Six months is ideal.
In general, boas are best housed separately except during mating season.
Things to Consider
Before taking on a pet red-tailed boa constrictor there are several things you need to seriously consider.
Do you have the resources to take care of a snake? You’ll need money to set up an adequate and large enough enclosure, as well as provide an adequate diet and vet care.
These snakes can live for twenty to thirty years so they are a long-term commitment. Your teenager may be excited to have a pet snake but what will happen when he goes to college? Do you want full responsibility for the snake? Can he take it with him to his dorm room? Think about the future, not just the current situation.
Can your family deal with having a snake in the house? Will they mind sharing freezer space with frozen rodents? It will be difficult if your family is not onboard with idea of owning a boa.
Children should never handle a snake without adult supervision so pet snakes are not always a good choice for families with small children.
If you rent an apartment or house, make sure your lease allows you to own exotic pets.
Who will take care of the snake if you’re out of town on vacation or in the hospital for an unexpected health problem? Many people are uncomfortable around snakes so be sure you have someone who will be willing to pet sit for you.
Is there a vet in your area that cares for snakes? Some vet practices see only cats or dogs. You don’t want to have to travel a long distance every time your snake needs care or a check-up.
While red-tailed boas are a fascinating pet always remember that they are still a wild animal. Do as much research as possible before purchasing your snake. Join a local club or locate online forums where you can discuss issues with other boa owners.
Always use caution when interacting with your snake.